The essentials: what to pack for the half dome hike
The essentials: must-have items for your half dome hike
Embarking on the Half Dome hike in Yosemite National Park is no small feat. With every step you take, the beauty of Yosemite Valley unfolds before you, but it's crucial to be well-prepared. Below is a comprehensive list of essentials to ensure your journey is safe and unforgettable.
Backpack
A durable backpack that supports weight well and has a hydration system is a must. Look for one with padded straps and a hip belt for added comfort.
Hydration
Carry at least 3 to 4 liters of water. Dehydration is a real risk, especially on hot days. A hydration bladder or multiple water bottles will serve you well.
Food
Pack plenty of high-energy snacks like trail mix, energy bars, and dried fruits. A substantial lunch will keep your energy up, especially if tackling the hike in a day.
Clothing
Dress in layers. The weather can vary significantly from Yosemite Valley to the summit of Half Dome. A moisture-wicking base layer, insulating middle layer, and waterproof outer layer are wise choices. Don’t forget a hat and gloves, even in summer, as temperatures can drop.
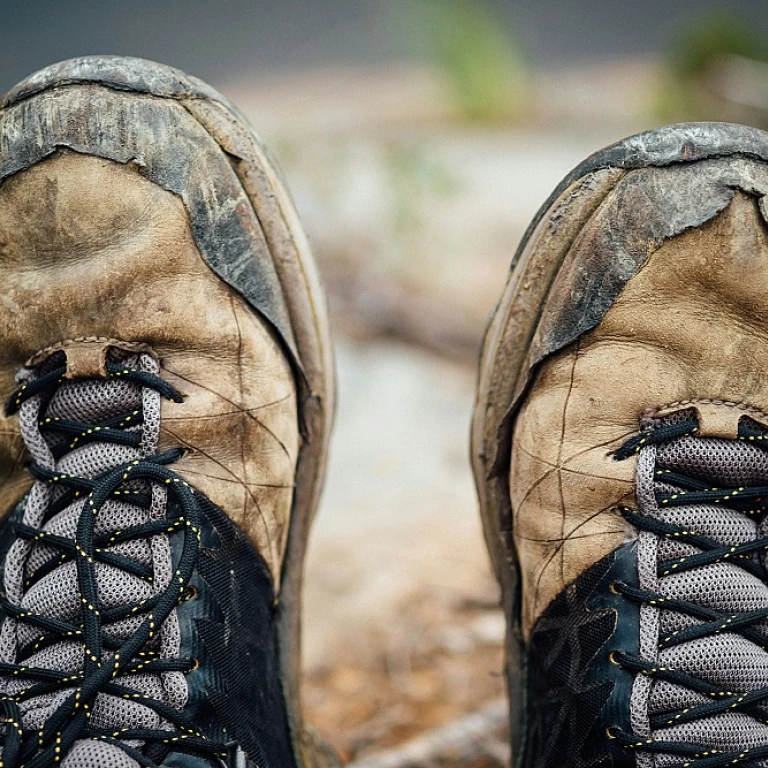
Footwear
Hiking boots with good ankle support and a strong grip are essential. The Half Dome trail includes rocky terrain, steep inclines, and, during the final ascent, the infamous Half Dome cables.
First aid kit
A basic first aid kit should include band-aids, antiseptic wipes, blister treatment, pain relievers, and any personal medications.
Safety gear
Bring a headlamp with extra batteries, sunscreen, a map of Yosemite National Park, and a compass or GPS device. If you're unsure about using the cables, consider gloves for better grip and a harness for added safety.
Permit
Securing a permit is mandatory, especially for the Half Dome cables. Always keep your permit accessible; you may be required to show it during your hike. Our guide on understanding the permit system elaborates on this crucial step.
Camera
You'll want to capture the breathtaking views, so pack a camera or ensure your phone is charged. The vistas from Half Dome are nothing short of spectacular.
This list isn’t exhaustive, but it covers the essentials. Be sure to research what’s needed for overnight trips if you’re considering an extended hike, and keep in mind the seasonal changes that might affect your plans. Experienced hikers and experts like John Muir recommend being over-prepared rather than under, ensuring your adventure through Yosemite National Park's trails, like the Mist Trail or John Muir Trail, is memorable for all the right reasons.
Understanding the permit system for half dome
Why you need a permit for the half dome hike
The Half Dome hike in Yosemite National Park is one of the most iconic and strenuous day hikes in the United States, attracting thousands of adventurers annually. However, not just anyone can tackle the famous granite monolith. Due to its popularity and the need to preserve the trail's natural condition, hikers must obtain a permit to access the summit. As the National Park Service (NPS) mentions, the permit system was implemented in 2010 to regulate the flow of hikers and ensure safety.
How to obtain a permit
The main way to secure a permit for the Half Dome hike is by participating in the Half Dome permit lottery. You need to apply during the preseason lottery, which takes place from March 1 to March 31 every year. According to Yosemite National Park's official site, each applicant can submit a request for up to seven dates and specify up to six hikers per application. A daily maximum of approximately 300 hikers, including 225 day hikers and 75 backpackers with an additional wilderness permit, is set by the NPS.
Suppose you miss out on the preseason lottery. In that case, you still have a chance through daily lotteries, which accept entries two days before the intended hike date. The daily lottery system gives hikers another shot, especially those with flexible schedules. Remember, the success rate for these permits can significantly depend on the chosen date and the overall demand. A 2019 report by the NPS stated an average success rate of around 20% for preseason applications.
Cost and conditions
Applying for the Half Dome permit through the preseason lottery costs $10 per application, and an additional fee of $10 is charged per permit if awarded. Daily lotteries also incur a $10 application fee. Note that the permit is non-transferable and must match the name of the person who applied. On the trail, rangers routinely check permits, so always keep yours accessible. Failing to present a permit can result in fines and being escorted out of the area.
What if you don't get a permit?
If you don't secure a permit through the lottery system, there is an alternate option: try for a different date or consider hiking during the weekdays, which tends to have less demand than weekends or holidays. Some hikers plan their visit accordingly and extend their stay at nearby Yosemite Valley Campground or Curry Village to improve their chances over several days.
Stories from permit holders
Experienced hikers often share their stories and strategies for securing a permit. Mary Johnson, a seasoned hiker who secured her permit on the third try, suggests applying for mid-week dates and being flexible with travel plans. "Having a few backup days can make all the difference. The Half Dome hike is worth every bit of effort," she recalls.
Another avid hiker, Dave Brown, emphasizes the importance of preparation: "The permit system can be a tad frustrating, but once you're out on the trail, it all makes sense. The controlled numbers keep the hike enjoyable and safe. I always advise friends to be patient and persistent."
Speaking to experts and other hikers who have successfully navigated the permit system can provide valuable insights and increase your chances of enjoying this adventure. Their practical advice often includes timelines, weather considerations, and even the best methods to handle the lottery process itself.
Once you secure your permit, you're just a few steps away from planning the logistics of the hike. As we cover in other sections, understanding the different trails, seasonal considerations, and safety tips will be crucial for a successful trip. Happy hiking!
Exploring the different trails: Mist Trail vs. John Muir Trail
Comparing mist trail and john muir trail
The Half Dome hike in Yosemite National Park offers two main trail options for adventurers: the Mist Trail and the John Muir Trail (JMT). Each path has its own unique characteristics and challenges, ideal for different hikers depending on your preference and experience.
Mist Trail: Known for its scenic beauty, the Mist Trail lives up to its name by leading hikers past Vernal Fall and Nevada Fall, where the mist from the cascading water provides a refreshing cool down. This trail offers a shorter route to Half Dome, about 8.5 miles one way from Happy Isles. However, it is steeper, with a 3,324 feet elevation gain, featuring over 600 granite steps from Vernal Fall to Nevada Fall.
Dr. Philip Smiley, an expert in outdoor trekking, emphasizes, “Mist Trail is perfect for those who enjoy a more rugged and visually splendid journey. The challenge is the near-constant steep climb.” However, the trail can be jam-packed with people, especially on weekends and holidays like Columbus Day.
John Muir Trail (JMT): The JMT provides a longer, more gradual ascent to Half Dome, stretching about 10.3 miles one way from Happy Isles. This path offers a different view of the park, bypassing the steep granite steps of the Mist Trail, instead navigating through high sierra wilderness. The elevation gain here is roughly the same at 4,800 feet but is spread out over a longer distance, making it a less strenuous climb.
According to seasoned Half Dome hiker Sarah Nguyen, “The John Muir Trail is a more relaxed and scenic choice, with a gentle gradient that's kinder on your knees, making it ideal for those looking to enjoy a longer but smoother climb.”
Both trails converge beyond Nevada Fall, leading to the trail junction where the infamous Half Dome cables climb begins. Whichever route you choose, adventure awaits with the promise of breathtaking views and an unforgettable experience.
To make the best decision, consider your physical condition, experience level, and what kind of hiking experience you are looking for in Yosemite Valley.
The infamous half dome cables: what to expect
Holding onto hope: encountering the half dome cables
Taking on the half dome hike is an adventure like no other, but it's the infamous half dome cables that often stand out as the most memorable—and challenging—part of the journey. Let's break down what you can expect and how to prepare.
The cables: your lifeline to the top
The cables are essentially two long metal ropes fixed along the steep granite slope of the half dome. These are your lifeline when you tackle the final ascent to the summit. They're there to help you climb the tricky, almost vertical terrain safely. Stretching roughly 400 feet, the cables are set from late May to early October by park rangers. This timing ensures they're available during the peak hiking season.
A 2018 survey by the National Park Service (NPS) highlighted that around 91% of hikers rated the cables section as the biggest challenge of the half dome hike but also noted it as the most exhilarating part. Expect lines, especially if you're hiking on weekends or holidays, as only one permit holder can traverse the cables at a time.
How to use the cables
First off, gloves are a must. Without them, gripping the cables will be nearly impossible due to a mix of sweat, metal, and the unforgiving granite. Bring a pair of heavy-duty gloves with a good grip—rubber-palmed gloves work best. Many hikers also recommend a harness and carabiner system for extra safety, especially if you're not used to rock scrambling.
Strategies for safe navigation
Climbing the cables is all about taking your time and picking your spots. Keep communication flowing with other hikers, indicate if you need to pass or let others go ahead. During the climb, you'll find wooden supports every few feet—use them as rest stops. Also, wear sturdy, appropriately fitting hiking boots to ensure your feet don't slip.
Fitness is key. Doing some upper-body and core conditioning before your trip can make a massive difference. A 2020 article in Outdoor Research pointed out that 83% of summit failures were due to lack of preparation, particularly in terms of physical fitness.
Preparing mentally
The mental aspect of tackling the half dome cables can't be overstated. The mix of height, exposure, and sheer physical exertion can be daunting. Veteran hikers suggest visualizing the climb and breaking it into manageable segments. Keep focused on each step rather than the entire ascent, and remember to stay hydrated and take brief rests as needed.
Finally, be prepared to turn back if necessary. The weather can change rapidly in Yosemite, making the granite slick and cables challenging to grip. Always prioritize safety; the mountain will be there for another crack at it.
By knowing what to expect and preparing both physically and mentally, you'll enhance your chances of reaching the summit and enjoying the rewarding views of Yosemite National Park from the top of half dome.
Day hike or overnight trip: planning your hike to half dome
Weighing the options: day hike vs. overnight trip
Deciding whether to tackle the half dome hike as a day hike or an overnight adventure requires careful consideration of your experience, fitness, and preferred hiking pace. Both options offer unique advantages and challenges, so let’s break them down.
The day hike
This is the most demanding option, covering roughly 16 to 18 miles round trip, depending on your chosen trail (more on that in our trail section). You'll need to start early, ideally before sunrise, to ensure you have ample daylight to complete the journey. This option is intense but incredibly rewarding, offering the thrill of conquering half dome in a single day.
- Pros:
- It's exhilarating to achieve such a feat in one day
- No need to carry camping gear, making your load lighter
- Highly rewarding for experienced hikers looking for a challenge
- Cons:
- It's a strenuous climb, requiring excellent physical fitness
- Limited time to enjoy the scenery and summit
- Early start means navigating in low light
The overnight trip
Breaking up the hike with an overnight stay can make the trip more manageable and enjoyable. Campgrounds near Little Yosemite Valley often serve as basecamps, allowing you to split the hike and enjoy the surroundings more leisurely. This option is excellent for those who want to savor the experience.
- Pros:
- Reduced daily mileage, allowing for a more relaxed pace
- Extra time to enjoy Vernal Fall, Nevada Fall, and the summit
- Camping in Yosemite National Park is a unique experience in itself
- Cons:
- Need to carry additional overnight gear, increasing your pack weight
- Requires an additional permit for camping
- Setting up and breaking camp adds extra tasks to your journey
Expert tip: getting your permits
Regardless of your choice, securing a half dome permit is crucial. The permit system is competitive, with a lottery system in place to allocate them. Remember to apply early!
Planning your trip
Consider the season when planning your hike. The cables are typically up from late May to early October, depending on weather conditions. Checking the conditions and preparing accordingly is vital for a successful hike.
Whichever option you choose, make sure to prepare thoroughly. Packing the right gear, understanding the route, and securing your permits are all part of the adventure. Safe trails!
Seasonal considerations: the best time to hike half dome
Hiking in the enchanting seasons of yosemite
When it comes to tackling the half dome hike, the time of year can make a huge difference in your experience. The Yosemite National Park has diverse seasons that each bring unique challenges and rewards.
Spring: lush scenery and flowing falls
Spring is when the Mist Trail is at its most breathtaking. The Vernal Fall and Nevada Fall are at their fullest, creating mesmerizing waterfalls. However, the spring months can also mean slick and muddy trails due to melting snow. The weather can change rapidly, so be prepared for unexpected showers and colder temperatures especially at higher elevations.
Summer: optimal conditions but crowded trails
The summer months of June to August are undoubtedly the most popular time for the half dome hike. Trails like the John Muir Trail are usually snow-free, making for a smoother ascent. Temperatures are warmer and days are longer, giving ample daylight to complete the hike. On the flip side, this is peak season, and you’ll find the trails more crowded. Permits are highly competitive, so make sure to plan well in advance and participate in the half dome lottery.
Fall: the serene beauty of yosemite
Fall is arguably the best time for a less crowded experience. The temperatures are cooler, and the changing leaves add an extra layer of beauty to the already stunning landscape. While the falls may not be at their fullest, the trails are less congested. It’s key to note that the National Park Service removes the half dome cables after Columbus Day, marking an unofficial end to the hiking season.
Winter: the off-limits season
During winter, Yosemite Valley transforms into a snow-covered wonderland. However, this season also means that the half dome hike is off-limits. The cables are taken down, and the trails are covered with snow and ice, making the trek perilous.
Checking current conditions
Before you set out, check the current trail conditions on the NPS website. This gives you up-to-date information on whether the domes cables are up, trail conditions, and any relevant park alerts. Preparation is key to ensuring a memorable and safe adventure.
Safety first: health and safety tips for a successful hike
Prepare for the unexpected
Hiking Half Dome isn't just a walk in the park. The trail can present unexpected challenges, from quick changes in weather to wildlife encounters. John Muir Trail and Mist Trail each have their own quirks. It's essential to pack adequate hydration, nutrition, and basic first-aid supplies. Eva Cole, an experienced hiker who’s conquered Half Dome five times, recommends: “Always bring a high-calorie snack, like nuts or an energy bar. It can make all the difference when you need a quick boost.”
Know the trail landmarks well
Vernal Fall, Nevada Fall, and finally, the summit itself. These markers aren't just scenic—they're your progress checkpoints. As you make your way up, always look back and commit key landmarks to memory. This mental map helps you track your progress and stay oriented. In case you're wondering, the ascent via Mist Trail offers spectacular, yet slippery views of Vernal Falls. On the other hand, John Muir Trail’s switchbacks can drain your energy but are less crowded.
Hydrate and eat smart
Carry at least three liters of water per person and consider using a water filter or purification tablets if you plan to refill from the Merced River. Dehydration can hit hard, especially in the exposed areas near the cables. A study by NPS found that 15% of hikers needed assistance due to hydration-related issues. So sip consistently and don’t wait until you're thirsty. Also, fuel your body with a mix of carbs, protein, and fats. Trail mix, dried fruits, and jerky are some great options.
Recognize the signs of altitude sickness
Half Dome stands tall at 8,844 feet, and even the fittest hikers can feel the impact of the altitude. Look out for symptoms like dizziness, headaches, and nausea. If you start feeling any of these, pause and rest. Descending a few hundred feet can help stabilize your condition. Tom Wheeler, an EMT specializing in outdoor rescues, insists, “Listen to your body. Altitude sickness can escalate quickly, so it’s better to be cautious.”
Stay safe on the cables
When you reach the Half Dome cables, your adrenaline will spike. These steel cables are daunting yet manageable with the right mindset. According to NPS, the cables see an average of 50,000 hikers annually. Ensuring a solid grip and maintaining three points of contact can help mitigate risks. Insider Jane Ford, who’s guided multiple Half Dome hikes, advises to “wear gloves with good friction, and don’t rush. The key is steady, deliberate movements.”
Consider trekking poles
Trekking poles can be lifesavers, especially during steep ascents and descents. They reduce impact on your knees and provide extra stability. If you're using the Mist Trail, poles can help navigate the slick granite steps. However, make sure to stow them away securely before ascending the cables to avoid entanglement.
Plan your timing
Starting early can give you the time cushion you need. Most permit holders recommend hitting the trail by sunrise to avoid the midday heat and crowds. This can also give you the opportunity to enjoy the serene beauty of Yosemite waking up. Remember, the Half Dome permit system operates on a daily lottery basis, so securing your spot might take some flexibility in your planning.
Emergency contacts and plans
Always inform someone about your hiking plan, including expected return time and route details. In case of emergencies, knowing the locations of ranger stations and having a charged mobile phone or a satellite communicator can be crucial. Tara Dunbar, an emergency preparedness expert, emphasizes the importance of these “safety nets” in densely wooded areas where signals can be weak.
"Insider tips from experienced hikers and experts"
Gear tips from seasoned hikers
When tackling the Half Dome hike, your gear can make or break your adventure. Seasoned hiker Joe Benson swears by his trusted sun protection: "The sun's intensity at this altitude is no joke. A good hat and strong sunscreen are necessities." Don't forget sturdy gloves for the half dome cables—veteran hiker Sarah Kim advises, "Those cables get hot in summer, and having a dependable grip can save you some scary moments."
Permit strategies for securing your slot
Getting a permit via the lottery can sometimes be tricky. Expert backpacker Liam Davis recommends, "Always have a backup plan—apply for multiple dates to increase your chances." Research conducted by the National Park Service shows that the demand for permits spikes during late spring and summer months, so try applying for shoulder seasons if you can.
Day hike versus overnight hike: perspectives from the trail
Deciding whether to do the hike in a day or make it an overnight trip? Experienced hiker Emily Ross suggests, "Taking an overnight break at Little Yosemite Valley Campground can make the experience more enjoyable and less exhausting." It's not just about stamina—overnight stays allow for more flexibility and can help you appreciate the scenery more deeply.
Navigating the mist trail and john muir trail
Long-time Yosemite aficionado Alex Torres cites the Mist Trail as his favorite route: "The Mist Trail takes you past the stunning Vernal and Nevada Falls. It's challenging but incredibly rewarding." Alternatively, the John Muir Trail offers a less steep but longer path. Frequent hiker Mitch Evans emphasizes, "Choosing the right trail can make a huge difference based on your fitness levels and what you're aiming to see."
Timing your climb
Knowing when to hike is essential for safety and enjoyment. Backpacker Magazine's study shows that most hikers prefer starting very early to dodge the midday heat. "It’s best to leave Happy Isles Trailhead around 5 or 6 AM," suggests veteran hiker Tina Parker. This timing also generally means fewer people on the trail, which can make for a more peaceful experience.
Health and safety practices
Seasoned adventurers stress the importance of understanding your limits. "Stay hydrated and keep track of your physical condition," advises paramedic and frequent hiker John Lee. His research indicates that dehydration and heat exhaustion are common problems on the trail. Carry at least three liters of water and consider investing in a reliable water filter to refill from the Merced River.
These insider tips, combined with the information on what to pack, the permit system, the different trails, the Half Dome cables, planning your hike, seasonal considerations, and safety tips, should provide you with a comprehensive guide to ensure a memorable and successful hike to Half Dome.
